

360 videos are one of the latest developments in video technology and are quickly becoming a great tool for grabbing viewers’ attention.
They are interactive, giving you the chance to immerse yourself in the world of the recording.
Seeing as these kinds of videos are quite new, you may not know how they are created nor which platforms can display them.
So, keep reading to discover how you can make your own 360 video, how to upload it to YouTube, and what the benefits are for creating these kinds of visuals.
What Are 360 Degree Videos?
A 360 degree video is a type of visual recording that allows you to see everything that happens around the camera in a spherical view.
This gives you the opportunity to choose the view you want to see rather than just passively watch what’s happening.
They are made using an omnidirectional (every direction) camera or a group of cameras pointing in different directions.
There are two kinds of 360 degree videos. They give you different views of what is recorded. They are called:
- Monoscopic: the video is made up of images that are blended together in a 2D format. As you look around the 360 degree view, the images will be displayed flatly.
- Stereoscopic: stereoscopic videos are meant to look more like the world as you see it through your eyes. Two lenses record simultaneously so that a sense of depth can be included in the video.
What Is The Difference Between 360 & VR Videos?
There is a key difference between 360 and virtual reality (VR) videos and that is how you watch them.
360 degree videos only require a screen like the one you have on your computer or smartphone.
You can watch the video and interact with it by clicking on the controls with your cursor or your fingers.
If you want to watch a VR video, you need a VR headset like an Oculus Rift or Google Cardboard.
These gadgets let you control the view by turning your head instead of pressing specific buttons.
Another way to think of the difference is like this: you watch a 360 degree video on a screen like a movie while a VR video puts you in the world you’re viewing.
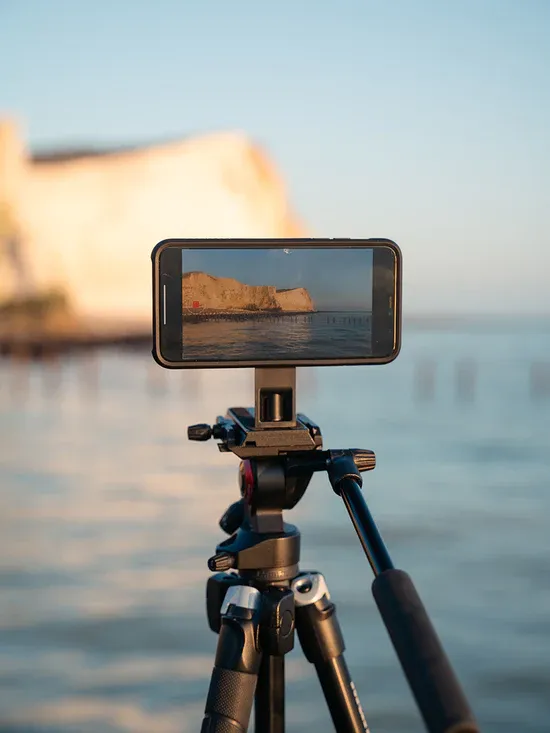
How To Record A 360 Video: Gear Review
360 video cameras have become very common in the last few years.
They come in a range of prices, quality levels, and sizes. You can check this YouTube-suggested list of cameras that create videos in the desired format for uploading to this video platform.
Aside from the camera, you will need a tripod for static recordings or a mounting piece if you want to use it for physical activities.
You can also look into getting a spatial audio recording system so that you can record sounds in 360 that will match up with your visuals.
Here are some of the best 360 video cameras for you to compare:
GoPro MAX
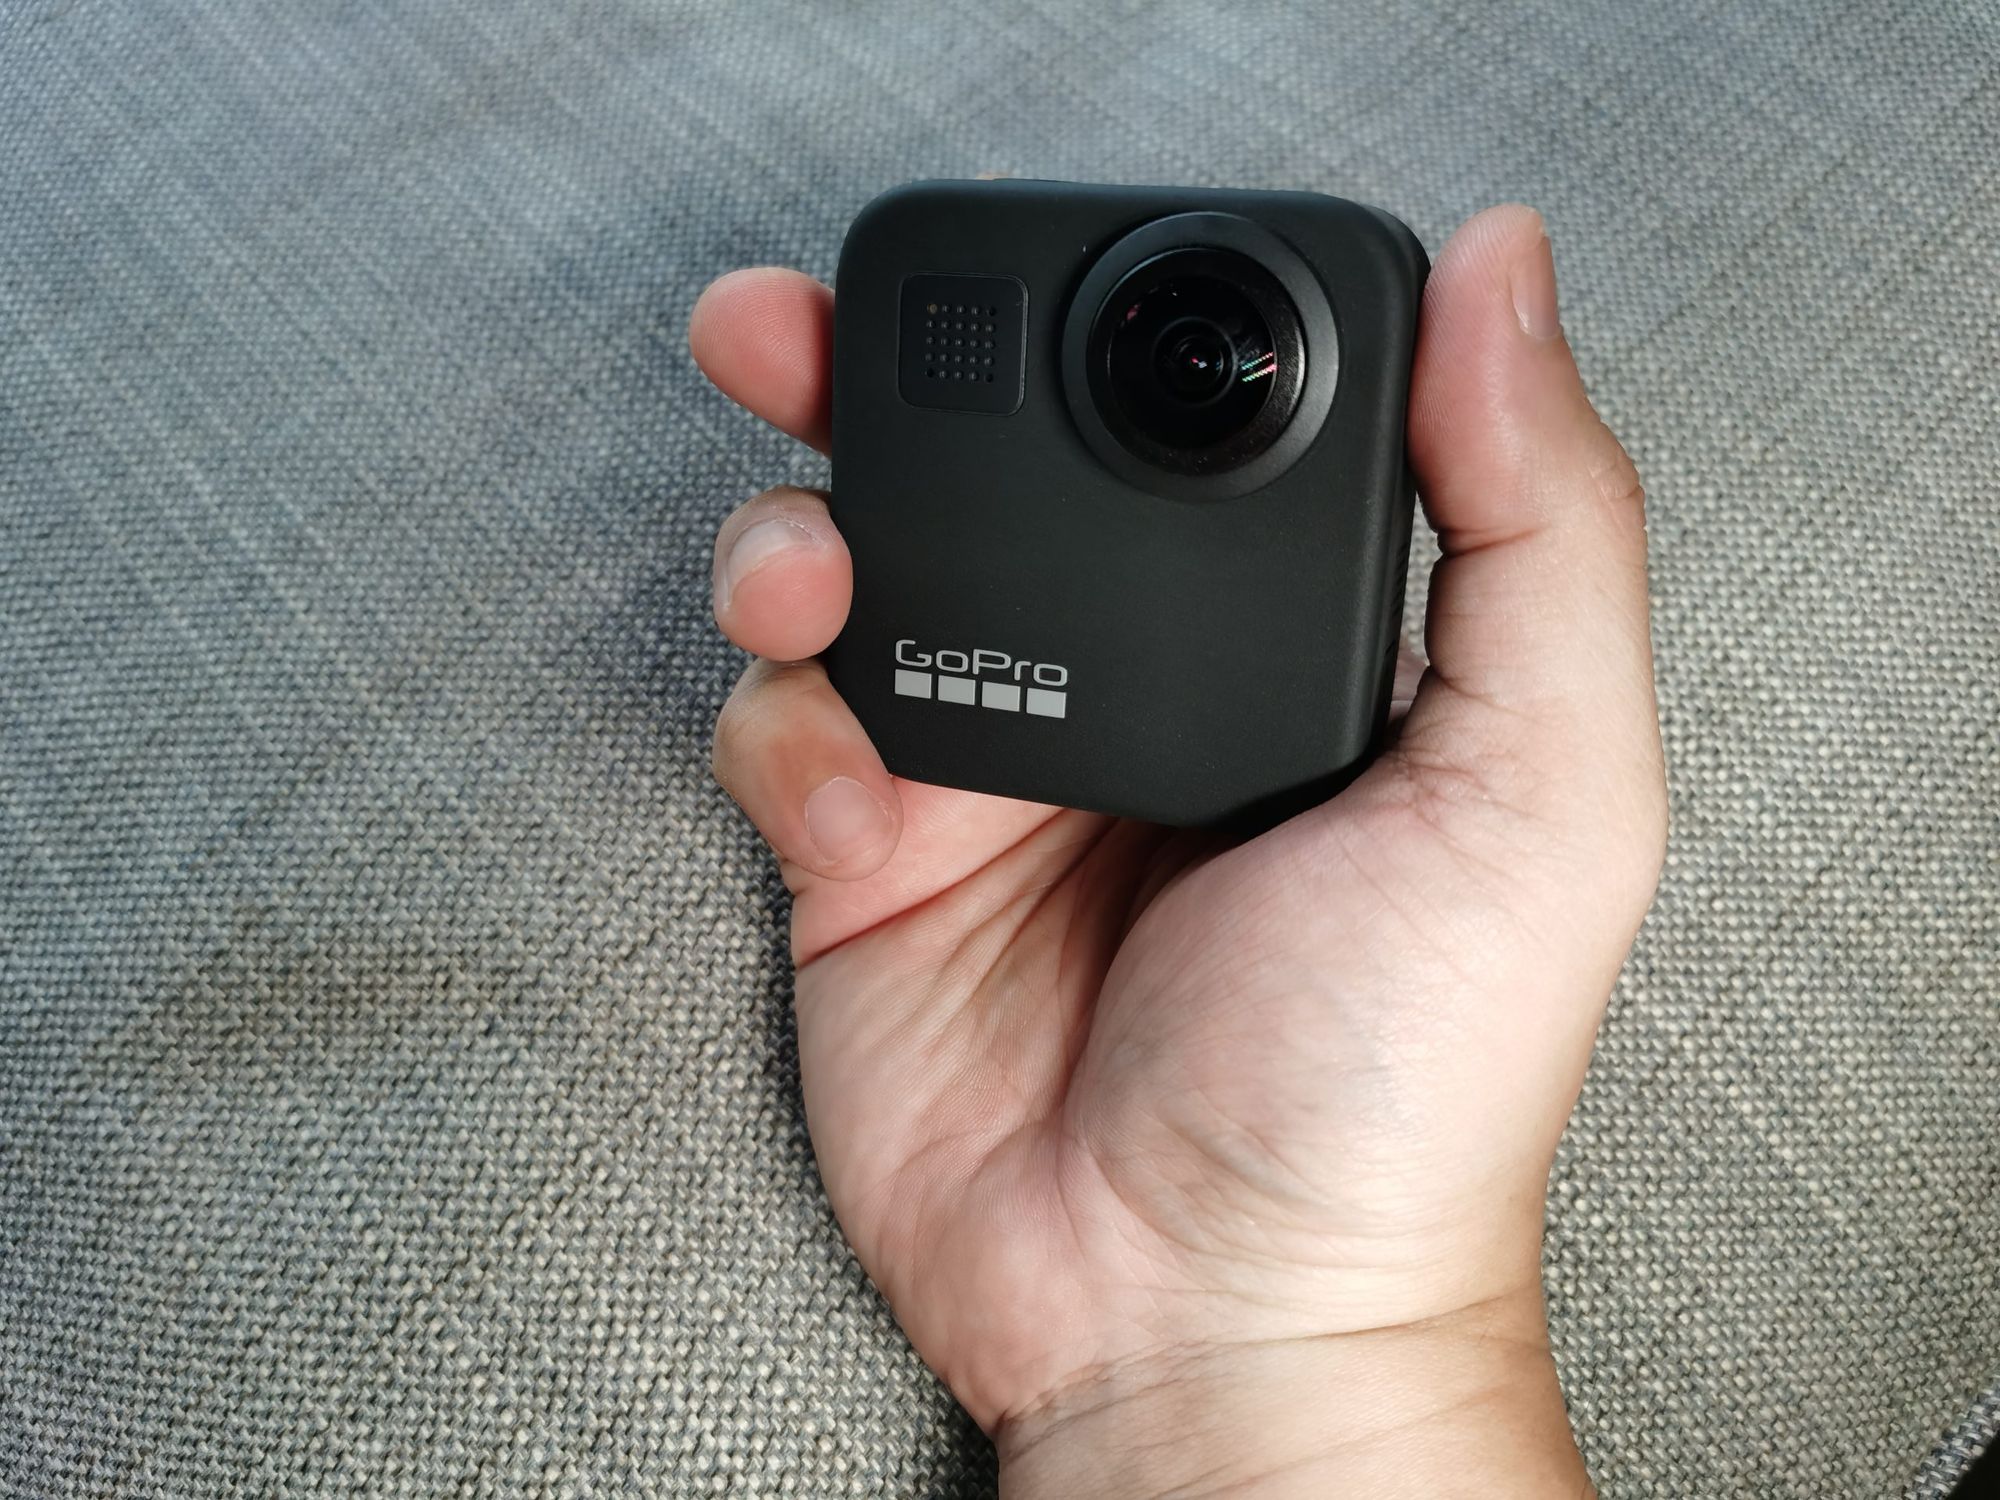
GoPro has always made cameras that are versatile and perfect for outdoor activities.
Their MAX 360 camera is no exception, as it is sturdy, easy to mount, and waterproof.
It has three cameras for capturing a flawless 360 degree view, as well as 360 spatial sound.
It has a stabilizer system and records in 6K. You can even stream directly to YouTube.
KanDao Obsidian R
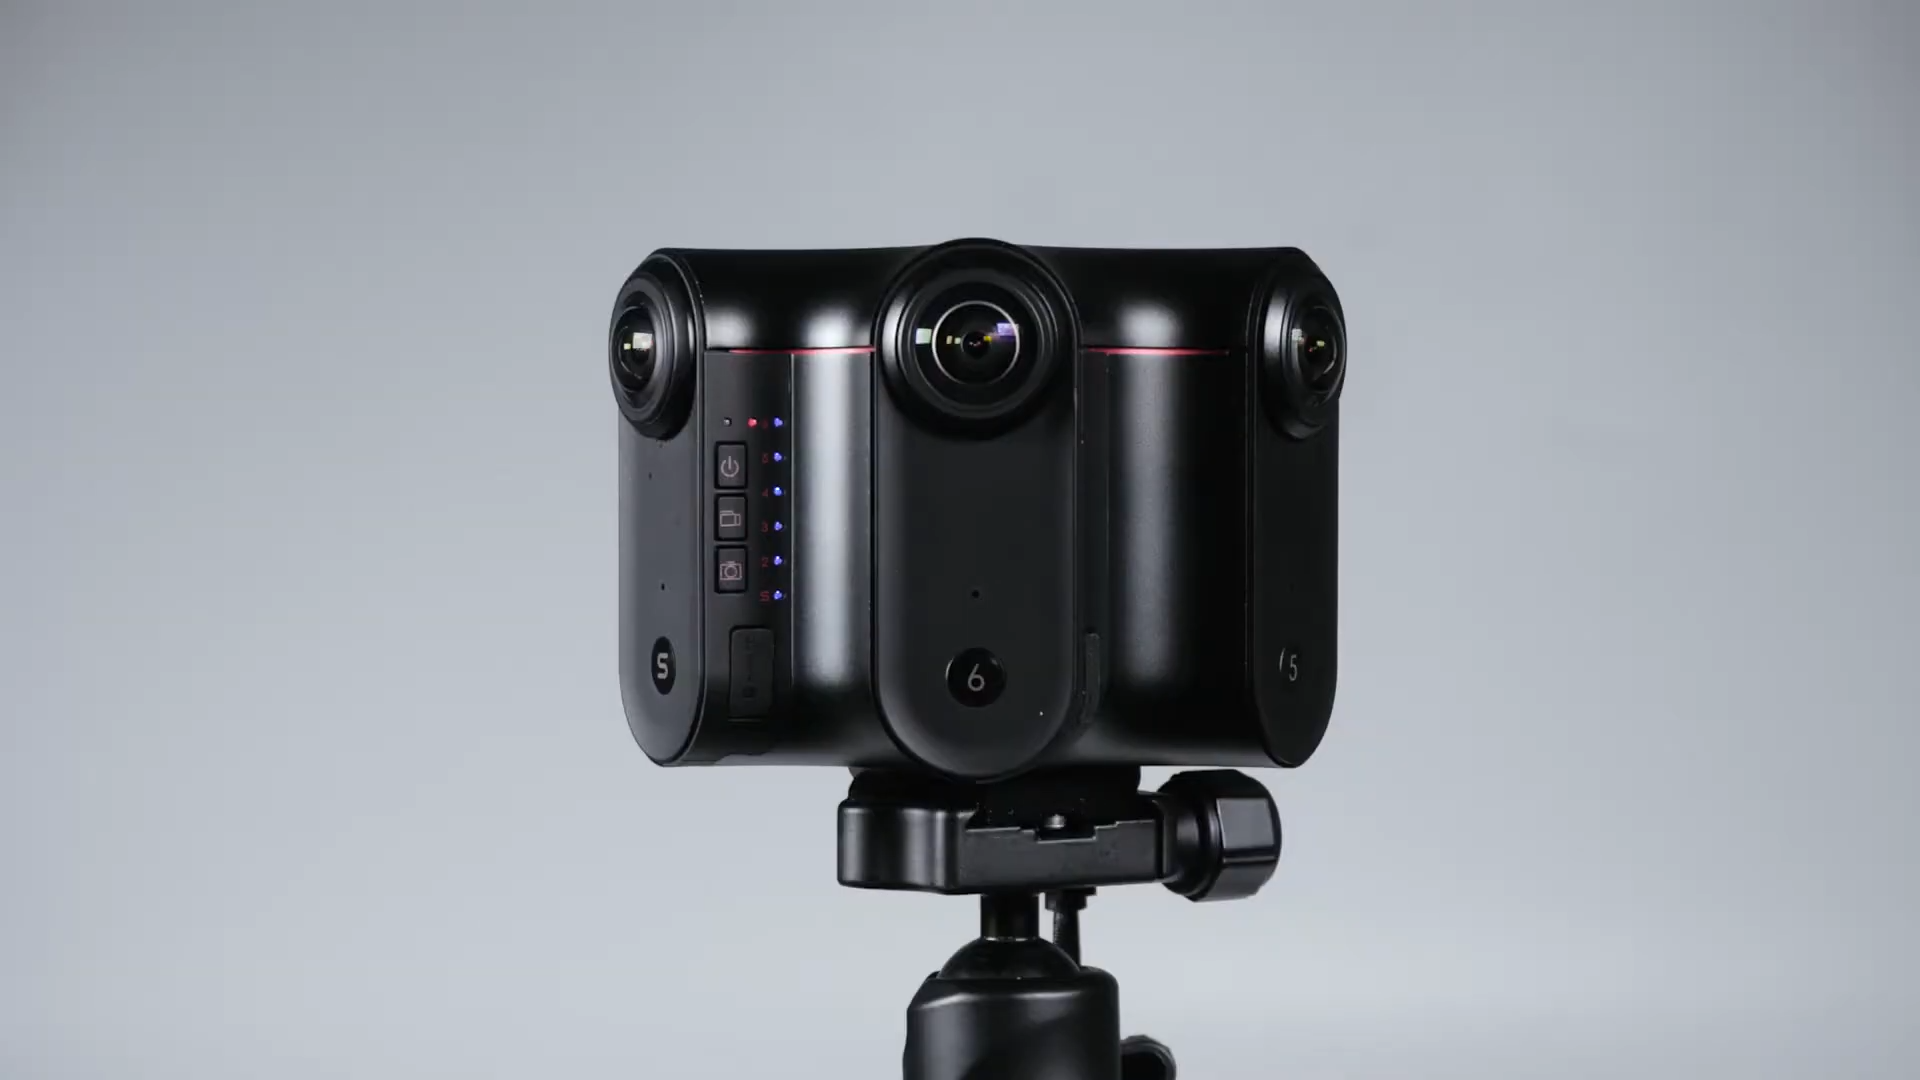
KanDao’s Obsidian R camera includes six high-resolution lenses for incredible results.
You can choose between 8K 30fps or 4K 60fps videos, as well as 8K photos.
This camera can be used for stereoscopic videos, giving you a realistic recording of the world.
One of the best features of the Obsidian R is that you control it using the KanDao app through your phone, laptop, or tablet.
Insta360 One X

The Insta360 One X is a compact camera that can film in a variety of resolutions. Edit the frame rate between 30 and 100fps for stunning visuals.
You can even choose to record in slow motion or with a selection of extra gadgets like the invisible selfie-stick and the aerodynamic Drifter.
If you want to film your bike rides or ski runs, you can record GPS data as well so that you can incorporate your speed, altitude, coordinates, etc.
How To Shoot A 360 Video: Skill Review
Shooting a 360 video is very different to recording a standard video. Here are some tips to remember so that you can create amazing visuals:
Align Your Stand
Whether you’re using a tripod or a selfie stick, you need to be careful to place it correctly so that it doesn’t appear in your video.
360 means that every side of the camera will be recorded, unlike standard cameras which only capture a relatively small visual in front of them.
Aim Carefully
If your camera comes with two lenses (front and back), the video will have two small stitch zones where the recordings will be connected.
As these cameras and their editing software become more advanced, these zones become more imperceptible.
However, if your main subject is directly between the two lenses, you’re going to lose focus on it.
Clean Your Lenses
Just as with any camera, you want to make sure your lenses are clean before you start shooting.
You don’t want any dirt or dust to ruin the incredible 360 video of your skydive. It’s not like you can set up the shot and try again in a hurry.
Choose Your Clip Length
Clips shouldn’t be too long, as high-resolution 360 videos take up a lot of memory space.
They also need higher processing power to edit, so the shorter the better. Having said that, you should also film more than you actually need as something might happen in the shot that you don’t want, like a person staring straight at the lens.
So, aim for clips that are longer than you expect to use, but not so long as to take up all your computer’s processing capabilities when it comes time to edit.
Improve The Lighting
The dynamic range of 360 cameras isn’t amazing, so you may need to increase the lighting wherever you decide to shoot.
Outdoor shots on sunny days can look amazing, but the darker the environment, the lower the chance of your video being as good as it should.
Have Fun
360 videos are recent additions to the visual arts, so you can play with the rules and find the best options for you. Experimenting might give you unusable videos, but it might also give you something unique.
These tips can help you to prepare for shooting a 360 video. Once you feel you’re ready, the only thing you need to do is hit record, either on the camera itself or in its dedicated app on your phone or tablet.
360 Video Editors: How To Edit 360 Videos
When you buy a 360 camera, it should come with a stitching software.
This will allow you to connect all the recordings together at their respective angles, creating one spherical view.
Some cameras don’t even need a software of this type as they stitch the shots automatically.
Once you have the stitched footage, you can start editing the video just as you would with a traditional film.
Capturing more footage than needed will come in handy here so that you can select the best clips in order to create the perfect video.
In case you’re not sure which editing software to use, here are some suggestions:
How To Upload 360 Videos To YouTube
Uploading your 360 videos to YouTube isn’t as simple as with traditional videos.
You need to make sure that the format of the video will be recognized by the platform as a 360 visual so that your viewers can interact with it.
Here’s how you can upload 360 videos to YouTube:
For starters, check your video’s metadata. Your video should include the necessary code to show YouTube that it’s in a 360 format.
If it doesn’t, you will need to inject this metadata. You can do this with a metadata app like Spatial Media Metadata Injector.
You just need to select your video, mark it as Spherical (360), and click Inject Metadata.
The following steps are standard practice for uploading videos to YouTube:
- Open YouTube Studio.
- Click Create and then Upload Video.
- Click Select Files to choose your video.
- Edit the video’s details: title, description, thumbnail, etc.
- Once you’ve finished adding the details, click Publish.
Uploading a 360 video can take a lot longer than a regular video as the processing needed is very different.
Once it’s ready, watch the video from start to finish to confirm that it has been uploaded in the right format and that viewers can interact with it by using the controls.
Before you make it live, you can set sharing settings to private, and send to your trusted colleagues and friends for a review.
FAQ - Frequently Asked Questions
Where Else Can I Upload 360 Content?
Despite YouTube being the most common platform for uploading videos (360 or not), other services like Vimeo, Facebook, and Flickr can also support 360 content like videos and photos.
Why Should I Make 360 Videos Instead Of Regular Videos?
360 videos are a fantastic way for your viewers to interact with the visuals you have created, making them feel closer to you and your process. This can lead to an increase in impressions, views and engagement for your YouTube channel.
If you’re creating content for your business, 360 videos are a great choice as they give the customer a more in-depth view of the product or service you’re selling.
For example, if you’re a tour guide, a 360 video that includes visuals of your city will give future clients a more interactive idea of what a tour with you can be like.
Bottom Line
This guide looked into the world of 360 videos, giving you the chance to understand what they are, how they’re made, and how to upload them to YouTube.
No matter what you’re working on, you should experiment and have fun with the process.
Have you already started or are you taking your first steps? Let us know in the comments section below and share your 360 videos to us. The best ones will be featured in our weekly newsletter.

Join the conversation